How I quickly installed Django on Ubuntu 14.04.
You may want to follow these steps to very quickly get your hands wet with Django. Here’s how I did it creating the simplest possible setup. I began with a fresh install of Ubuntu Server 14.04 without Apache or Mysql. Since Django is python based you will of course need python which I installed first using the following commands.
sudo apt-get install libssl-dev openssl
wget https://www.python.org/ftp/python/3.4.3/Python-3.4.3.tgz
tar -xvf Python-3.4.1.tgz
cd Python-3.4.3/
./configure
sudo apt-get install make
sudo make install ./python
I could at this point use sudo aptitude install python-django which at the time of writing would install version 1.6 but since I wanted the latest official release I installed pip, a package management system for python which will give me access to version 1.8. I installed pip with
wget https://bootstrap.pypa.io/get-pip.py
sudo python get-pip.py
and finally installed Django with
sudo pip install Django
which returned a success message.
With Django installed I created my first project with the following command. I will be using this project to help provision some Polycom phones so I decided to call the project “provision”. Use whatever project name you like. Wherever you type the following command is where the project will be installed. It is highly recommended not to install the project in your web root folder as you want to keep these project files which will contain your code hidden. I installed my first project in /home/user.
django-admin startproject provision
This creates a directory with all your project files. I then initiated the built in database with manage.py which is located in your projects main directory. After navigating to the directory with manage.py type
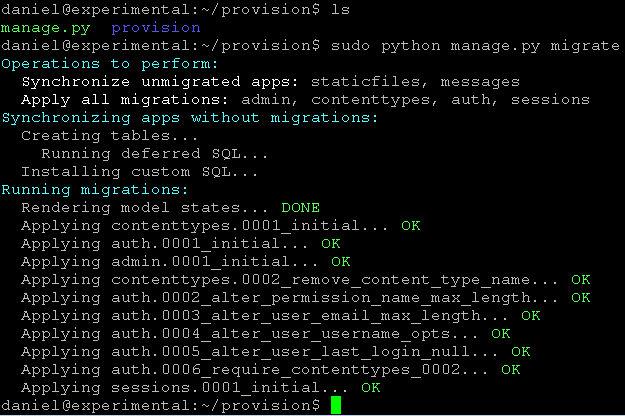
python manage.py migrate
If all goes well you will see something like
Now I am ready to run the development web server using the runserver command
python manage.py runserver 0.0.0.0:8002
which brings me to
Since I need to access my experimental server from another machine on the local network I used 0.0.0.0 as the IP and chose 8002 as the port. Leave the ip and port credentials out entirely if you are accessing the server from the local host.
going to MyServersIP:8002 on any computer in my local network takes me here. Yay!
Now you can continue writing your first Django project following their extremely well written tutorial HERE.


Leave a Reply