
A FreePBX Distro Project from Start to Finish
Part 1
Yes, It all began when we were assigned the task of setting up a new phone system at my work place. When the idea was introduced we only had two constraints to follow; First it had to be a VoIP system and second it had to be cheaper than what we were currently using. Our existing system was a high end VoIP service from a well known provider. Could we really match the service quality with a self hosted system? A co-worker had recommended two possible platforms, FreePBX or Elastix. Both are fully featured and very popular VoIP PBX systems which work together with Asterisk. After a bit of research we decided on FreePBX Distro, a distribution of FreePBX that includes the operating system (CentOS) and all the necessary programs pre-installed and configured. This article covers my experience with the official FreePBX Distro, version 6.12, 64BIT using voip.ms as a SIP trunk service provider.
For the sake of the curious, I will explain in detail my very first experience configuring the official FreePBX Distro VoIP system for about 50 users on a relatively small network with Polycom phones as endpoints. The excellent documentation and community surrounding FreePBX has been extremely helpful and made this an overall good experience.
The Install:
Installation of the Distro was as easy as downloading the bootable release image, and installing it. These are the instructions I followed to perform the install while selecting default values for every option that was presented. The machine we used was a virtual machine created by the free version of VMware ESXi 5.5. We used VMware’s Windows client to launch the Virtual Machine Wizard and chose the typical configuration with a 64bit CentOS profile giving it 2GB of RAM and about 30GB of HDD space. We wanted our phone system to be on it’s own VLAN so we placed our FreePBX virtual machine under a separate port group which was assigned a separate VLAN. Under that configuration all traffic from our FreePBX virtual machine gets tagged before it’s sent into our managed switch system connecting all our potential endpoints. We also decided to configure our pfSense firewall to handle DHCP for that vlan. For a concise introduction to VLANs Check this out. After the install we successfully logged into our user interface for the first time where we were prompted to create a user name and password.
System Registration:
Even though FreePBX is free we were required to register it through schmoozecom.com. This video explains the process. Registration went as expected.
Network Configuration:
A good place to start is the First Steps After Installation guide. During installation we chose the dynamic IP configuration option, then set a static IP afterwards. A static IP was assigned by logging in through our web interface (using the address given by our DHCP server) and going to System Admin and Network Settings. Their we assigned a static IP falling outside the range of addresses being handed out but within the subnet we defined in our pfSense router. The new chosen address became the one used to access the web interface from that point on.
Absolutely everything can be configured through the web interface. Exploring the interface I quickly discovered that I can hover my mouse over a small help icon beside each parameter for a fairly detailed description. I found these descriptions to be comprehensive and helpful. I wouldn’t say that all the menu formatting is intuitively laid out but the system is easy to use once you get familiar with it.
Our next stop was back in pfSense where we setup a NAT 1:1 mapping with a dedicated external IP address. This is the connection that our SIP service provider (voip.ms) will connect through. The 1:1 mapping makes sure that all incoming and outgoing traffic directed to our PBX will take place through that IP. Later on after a bit of trial and error we found it necessary to disable port rewrites as mentioned in this pfSense article.
Following the 1:1 mapping we went to Asterisk SIP Settings under Settings in the main menu of the web interface. There FreePBX was able to correctly detect our external IP. From that same screen there is a separate menu choice called “Chan SIP” at the top right. There we can assign various setting for our SIP channel.
Setting up a Trunk:
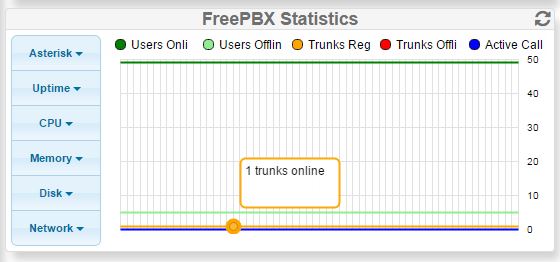
As mentioned we decided on voip.ms as a service provider based here in Canada. With that choice we have no regrets. There services and support which we have used extensively have been top notch. They offer a comprehensive set of features, so much so that I considered not hosting our own PBX system. They offer a switching system complete with voice mail, custom routing, IVR’s and message centers all included in the cost. We decided on hosting our PBX in house for access to a few extra features like the ability to check voice mail through a web interface and access additional routing options. All in all if you find yourself in a situation where you need a cost effective easy to setup phone system without the need to host your own PBX viop.ms is worth looking into. After creating an account with them you are assigned a SIP username and password and the ability to choose between a few dozen servers. We chose the server closest to us with the lowest ping time. We found the only necessary setting to change in voip.ms was our Inbound Settings. Under Device type we chose IP PBX server / Asterisk or softswitch. From within our PBX web interface we go to Connectivity -> Trunks -> Add SIP (chan_sip) Trunk, fill in the outbound caller ID, Pear details and Register String as seen here. User details can be left blank. With all values entered correctly we saw that our trunk was online under FreePBX Statistics on our System Status page. So far so good!
Outbound Routs:
Our next task was to configure inbound and outbound routes. We will need at least one outbound rout configured for our phones to connect through when making outbound calls and an inbound rout for each phone or IVR that will be associated with a phone number or DID. An outbound rout is setup by going to Connectivity -> Outbound Routs -> Add Rout. Here is where we name the route, choose our dial patterns and choose our trunk sequence for matched routs. We decided to leave Route CID blank so that the caller ID originating from each extension (Which is unique for each extension) will be the one that gets passed to the phone receiving the outbound call.
The dial patterns are basically the sets of digits or patterns of digits that will be matched to that particular outbound rout. If a set of digits does not match any of the patterns listed under Dial Patterns it will not be passed through that rout. Hoovering your mouse over the help icon beside dial patterns explains everything you need to know. Dial patterns wizards can also be used to quickly fill out the patterns you want for that rout.
A second outbound rout might be useful if you want to use a different SIP service provider for certain calls or if you want to use sub accounts within voip.ms with a different cost structure. Sub accounts in voip.ms are very easy to setup and use. Once you have created your sub account in voip.ms simply setup a new trunk with your new sub account credentials and add it to the trunk sequence in a new outbound rout. You can even setup your own custom cost structure if you choose to resell their service. At the time of writing a single DID costs a mere $0.85/month and usage is charged at $0.009/minute for both incoming and outgoing calls using their premium rout.
Extensions:
Extensions can be added one by one through the web GUI or in bulk using the Bulk Extensions module. Using the web GUI we went to Applications -> Extensions where modified display name, an Outbound CallerID and mailbox settings. The SIP secret is generated automatically. It’s a simple process adding extensions one by one but a rather time consuming one with 50 DID’s to configure. A better approach may have been to use the Bulk Extension Module. Our endpoint solution was a fleet of Polycom IP 335’s manged by the commercial Endpoint Manager package which I will cover later. I initially started provisioning the phones manually following polycom’s guide but found the situation much easier to work with using the commercial Endpoint Manager.
Inbound Routs:
Once our extensions were created it was time to map our DID’s to our extensions. One inbound route must be created for every number or DID you want to reach directly. DID stands for direct inward dialing which simply means that an outside caller is routed directly to the desired phone or location within the pbx without having to go through an IVR menu or receptionist.
From Connectivity -> Inbound Routs -> Add Incoming Route we added our description, DID number and the desired extension we wanted that number to ring.
Provisioning:
After provisioning the phones for a year by hand using methods specified by this document we finally decided to purchase the commercial endpoint manager and have no regrets. Using the endpoint manager saved us lots of time considering we tend to make changes to our phone system frequently. For provisioning we chose to communication with our phones via FTP. One minor issue we had was caused by permissions of folders and sub folders in the directory and subdirectory of our provisioning server. In our case this was located at /tftpboot. With every reboot Asterisk would reclaim full ownership leaving the phones unable to connect with their user account. To give both Asterisk and the phones access to the provisioning files we created a Linux group which included asterisk and the ftp user used by the phones. To delegate ownership of a folder and all it’s files to a group use
chgrp -R groupname foldername
To be continued in part 2… Creating an IVR, Enabling 911 and Security
Security:
Changing the SIP port of a phone must be done both on the phone through the provisioning files and on the pbx server.
From the endpoint manager go to Basefile Edit and modify MAC-Features.cfg
  <dialplan
   dialplan.1.routing.server.1.port="5060"
   dialplan.1.routing.server.2.port="5060"
   dialplan.2.routing.server.1.port="5060"
   dialplan.2.routing.server.2.port="5060"
Thanks a lot for the blog. Cool.